Enabling an Agent's Filesystem
This guide walks through how to give an agent its own filesystem so it can create, read, edit, and search text files across chats.
This guide walks through how to give an agent its own filesystem so it can create, read, edit, and search text files across chats.
Before you begin
- You must be the agent's owner, have edit or admin access to the agent, or be a workspace admin. If you only have view or execute access, you can see whether the filesystem is on, but you cannot turn it on or off.
- The agent must already exist. If you are creating a brand new agent, save it first and then open the edit page.
- Enabling the filesystem takes effect immediately. You do not need to click a separate Save button.
Steps
1. Open the agent edit page
From the main menu, go to Agents and find the agent you want to change. Click the agent to open its edit page. The address bar will show a path ending in /subagents/edit/ followed by the agent's identifier.
If the agent does not appear in the list, check that you are in the right workspace. Agents are scoped to a workspace and will not show up if you are signed in to a different one.
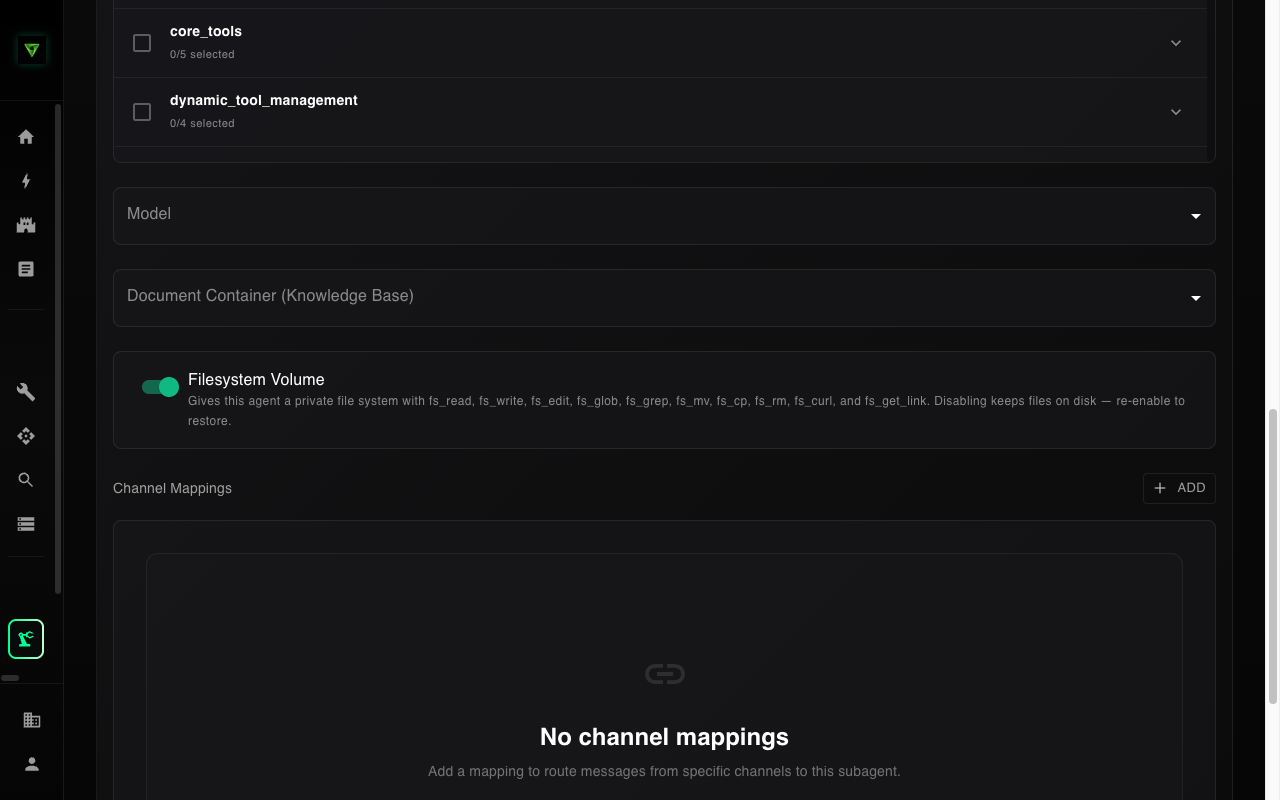
2. Find the Filesystem Volume toggle
Scroll down through the edit form past the label, description, system message, projects, tools, model, and knowledge base fields. Just above Channel Mappings you will see a bordered panel titled Filesystem Volume with a switch on the left and a short description on the right.
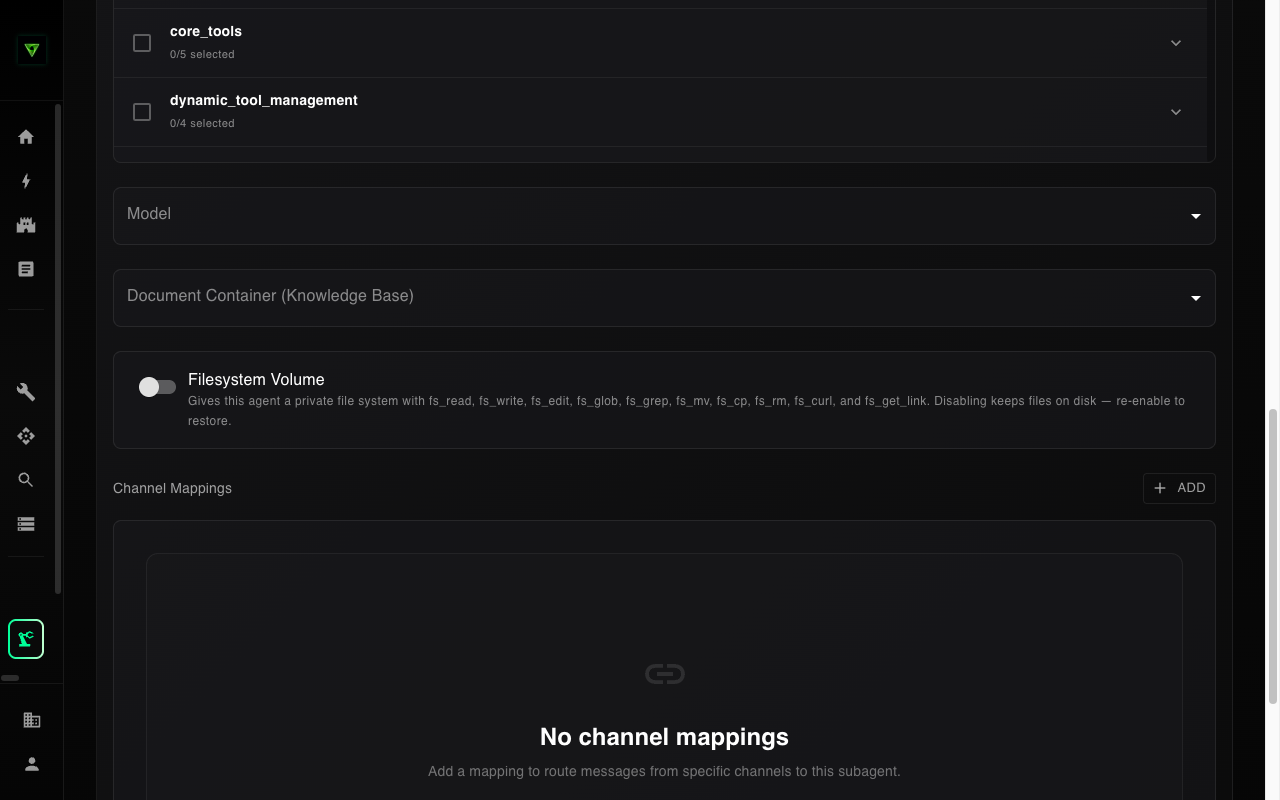
3. Turn the switch on
Click the switch. It will flip to the on position immediately. Within a second or two a confirmation message appears at the bottom of the screen saying Filesystem volume enabled.
If the switch briefly flips on and then slides back to off, the change failed. The confirmation message will be replaced with an error explaining why. The most common causes are:
- You do not have edit permission on the agent. Ask the owner or a workspace admin to turn it on, or to grant you edit access.
- Your session has expired. Sign out and back in, then try again.
- The page is stale. Refresh the browser and try again.
4. Start a new chat with the agent
Go back to the chat interface and open a new conversation with this agent. The agent now has ten new tools for working with files:
- Create and save a file
- Read a file, with line numbers
- Edit a file by replacing a specific string
- Find files by name
- Search across file contents
- Rename, copy, or delete a file
- Generate a temporary download link for a file
- Download a public web address and save it as a file
You do not see these tools anywhere in the interface — the agent uses them behind the scenes when you ask it to. For example, you can say "save these meeting notes to a file called 2024-meeting.md" and the agent will use the save tool. On a later chat with the same agent, you can ask "what did we discuss last time? check your notes" and it will read the file back.
5. Confirm the filesystem is really on
The easiest way to verify is to ask the agent directly. In a fresh chat, try a message like "create a file called /test.txt with the content hello and then read it back". If the filesystem is enabled, the agent will confirm it saved and read the file. If it is not enabled, the agent will say it does not have file tools available.
You can also confirm by revisiting the agent edit page — the Filesystem Volume switch should still be in the on position when you reopen the page.
What happens next
Once you have the filesystem on:
- The agent can create files during any chat with any user who has access to it.
- Files persist indefinitely until someone deletes them or until the agent's owner deletes the agent itself.
- If you turn the filesystem off later, files are kept and will reappear when you turn it back on. See Disabling an Agent's Filesystem for details.