Creating an MCP Server
This guide walks you through creating an MCP server that exposes your workspace tools to external AI clients.
This guide walks you through creating an MCP server that exposes your workspace tools to external AI clients.
Before you begin
- You need at least one tool available in your workspace. If no tools exist, the New Server button is disabled.
- You can expose all available tools, or select a smaller tool set from any tool pack in your workspace.
Steps
1. Open the MCP Servers settings
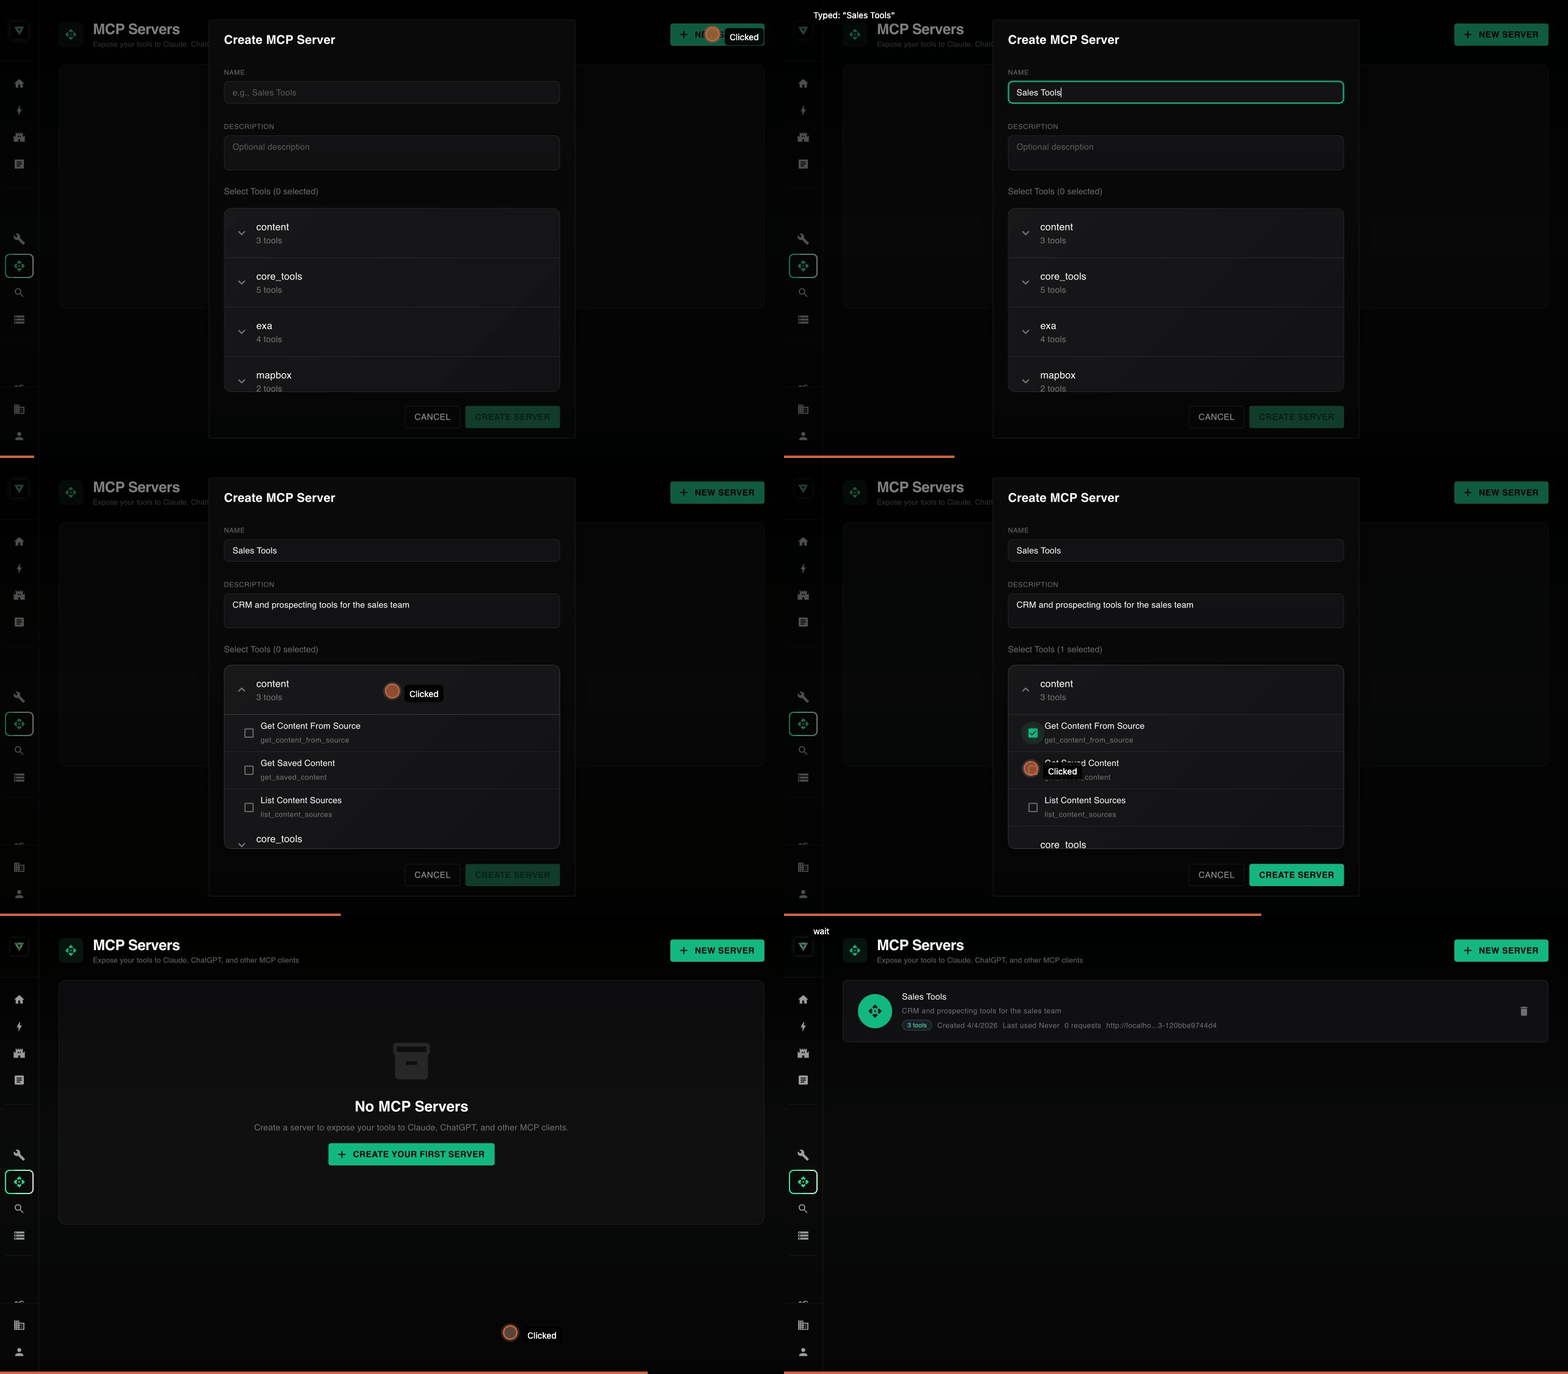
Navigate to Settings, then select MCP Servers. You see a list of any existing servers or an empty state prompting you to create your first one.
2. Start creating a new server
Click New Server in the top-right corner, or click Create Your First Server if you have no servers yet. The Create MCP Server dialog opens.
3. Enter a name
Type a name in the Name field. Choose something descriptive that identifies the purpose of this server (for example, "Sales Tools" or "Development Utilities"). This name is shown to clients during the authorization flow.
4. Add a description (optional)
Type a description in the Description field. This helps you and your team remember what the server is for.
5. Select tools
Under Tools, check the boxes next to each tool you want to include. Tools are grouped by tool pack. Click a pack name to expand or collapse it.
The selection counter shows how many tools you have selected.
Leave every tool unchecked to create a generic MCP server that exposes all tools available in your workspace.
If you have many tools, scroll down to load more.
6. Create the server
Click Create Server. The button is disabled until you provide a name.
7. Copy the server URL
After creation, a confirmation dialog shows your new Server URL. Click the copy button next to the URL to copy it to your clipboard.
Save this URL. You need it to configure your AI client.
8. Close the dialog
Click Done to close the confirmation dialog. Your new server appears in the MCP Servers list with its name, tool access, creation date, and server URL.
Connect your client
After copying the server URL, open your AI client and add it as a remote MCP server. Follow the setup guide for your client:
When the client connects for the first time, you are redirected to authorize the connection. See Authorizing an MCP client.
If something goes wrong, see Troubleshooting.