Managing the Rule List
This guide covers the ongoing work of keeping tool policies in shape: reading the list, changing the order, setting the workspace default, and reviewing what...
This guide covers the ongoing work of keeping tool policies in shape: reading the list, changing the order, setting the workspace default, and reviewing what was blocked.
Before you begin
- You must be a workspace admin to change anything. Members can view the list.
- Open Permissions and select the Tool Policies tab.
Who can do what
| Role | What it allows |
|---|---|
| Member | View the rules and the workspace default |
| Admin | Create, edit, reorder, disable, and delete rules. Change the workspace default. Use the simulator. Start a rule from Tool History. |
Reading the list
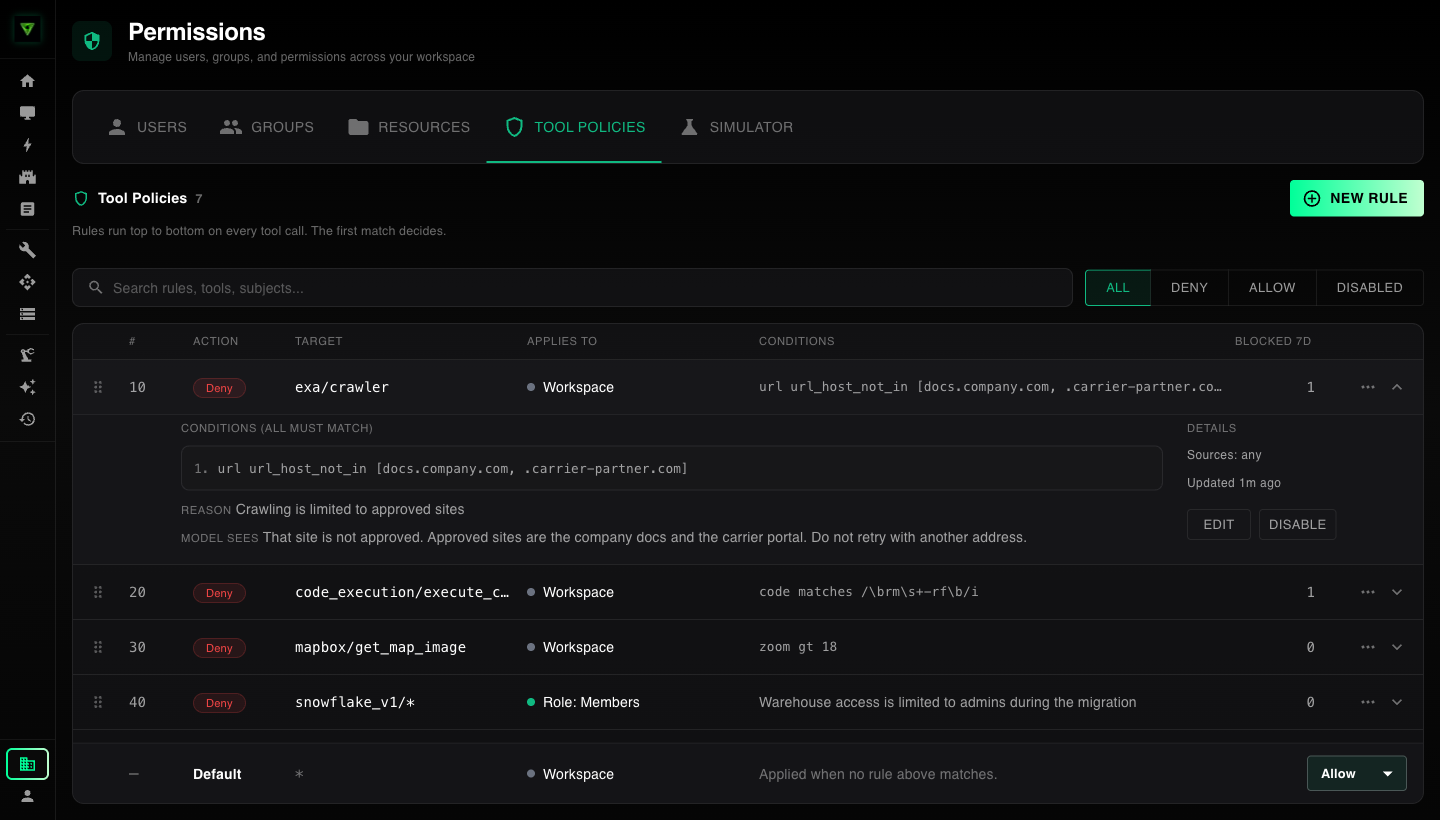
Each row is one rule. Rules are read from the top.
| Column | What it shows |
|---|---|
| # | The rule's position. Lower numbers are read first. |
| Action | Deny or Allow |
| Target | The tool pack and tool, or a pattern. * means every tool. |
| Applies to | Who the rule covers |
| Conditions | A summary of the conditions, or the reason when there are none |
| Blocked 7d | How many calls this rule blocked in the last seven days |
Click a row to expand it. The expanded row shows every condition in full, the reason, what the AI is told when a call is blocked, the sources the rule is limited to, and when it was last changed.
Use the search field to find rules by tool, person, or reason. Use All, Deny, Allow, and Disabled to filter the list.
Changing the order
The first rule that matches a call decides it, so order changes what happens.
Click the More menu at the end of a row and choose Move up or Move down. The option is unavailable when the rule is already at that end of the list.
To move a rule a long way, open it with Edit and use Placement to put it at the top, at the bottom, or after a specific rule.
A common arrangement, from top to bottom:
- Narrow exceptions that allow something for a specific group or agent.
- Rules that block specific tools or values.
- Broad rules that block a whole tool pack or pattern.
Setting the workspace default
The Default row at the bottom of the list decides any call that no rule matched.
| Default | What it means |
|---|---|
| Allow | Everything is permitted unless a rule blocks it. This is the starting setting. |
| Deny | Everything is blocked unless a rule allows it. |
Changing the default to Deny blocks every tool in the workspace that does not have an allow rule, for everyone, including admins and running agents. Before you switch:
- Add allow rules for the tools your team and agents need.
- Check them in the simulator for a few different people.
- Switch the default at a quiet time, and watch Tool History for blocked calls.
Turning a rule off without deleting it
Open the More menu and choose Disable. The rule stays in the list, keeps its position, and stops applying. Choose Enable to turn it back on.
Use this to pause a rule while you investigate, or to prepare a rule before you want it in effect.
Editing and deleting
- To change a rule, open the More menu and choose Edit, or expand the row and click Edit.
- To remove a rule, open the More menu and choose Delete. Deleting cannot be undone. Calls the rule blocked in the past stay in Tool History, with the reason recorded at the time.
Reviewing blocked calls
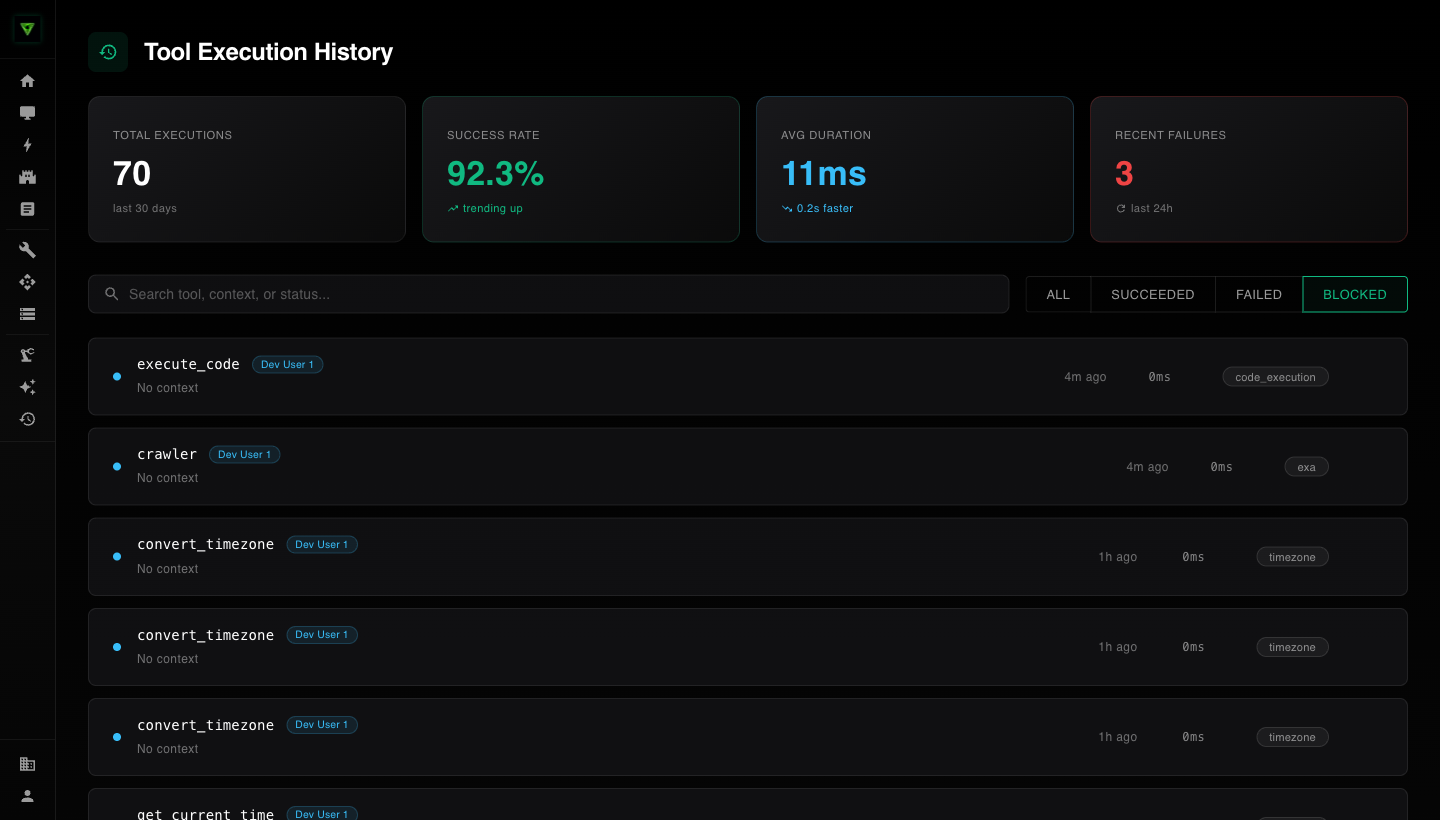
Open Tool History and select the Blocked filter. Blocked calls have a blue marker.
Click a call to see Execution Details. Under Blocked by policy you will find the reason on the rule that stopped the call and the message the AI was given. The values the call was made with are shown below.
Blocked calls count toward the total number of executions. They do not count against the success rate, because the tool never ran.
Review blocked calls after adding a rule. A high count on a new rule can mean it is catching calls you meant to allow.
When changes take effect
A change applies to the next tool call in a new turn. A chat turn or agent run that is already in progress keeps the rules it started with until its next turn.